Chúng ta sẽ điểm qua 5 cách làm sau
- CSS animation dựa trên component
state - JS style animation dựa trên component
state - React Motion của tác giả Cheng Lou
- Thư viện Animated
- Thư viện Velocity-React
Toàn bộ source code demo
CSS animation dựa trên component state
Cách cơ bản và dễ hình dung nhất, sử dụng class CSS, add/remove các class này để thực thi một animation. Nếu đang sử dụng CSS trong App rồi thì đây là cách làm khá ok, performance khá tốt.
Nhược
Không hỗ trợ cross-platform, cơ bản là không chạy được trên React Native, chỉ chạy các trình duyệt hỗ trợ các thuộc tính CSS dùng để làm animation. Phụ thuộc vào CSS và DOM nên cũng hạn chế các thay đổi theo logic phức tạp.
Ưu
Do chỉ thực hiện trên CSS nên các thuộc tính thay đổi gần như chỉ là Opacity, Transform, performance không phải là vấn đề lo ngại, thay đổi các giá trị này theo state cũng đương đối dễ, smooth, không can thiệp quá trình render.
Ví dụ làm transition khi input focus

.input {
  transition: width .35s linear;
  outline: none;
  border: none;
  border-radius: 4px;
  padding: 10px;
  font-size: 20px;
  width: 150px;
  background-color: #dddddd;
}

.input-focused {
  width: 240px;
}
Kết hợp với React, ta sẽ thêm 2 event listener trên input khi nó focus và blur
class App extends Component {
  state = {
    focused: false
  }
  componentDidMount() {
    this.input.addEventListener('focus', this.focus);
    this.input.addEventListener('blur', this.focus);
  }
  focus = () => {
    this.setState((state) => ({ focused: !state.focused }))
  }
  render() {
    return (
      <div className="App">
        <div className="container">
          <input
            ref={input => this.input = input}
            className={['input', this.state.focused && 'input-focused'].join(' ')}
          />
        </div>
      </div>
    );
  }
}
JS Style animation dựa trên component state
Cách này cũng tương tự như sử dụng class CSS. Thật là viết inline css để ta có thể control được các logic trong file js luôn
Nhược
Tương tự như CSS Animation
Ưu
Tương tự như CSS Animation

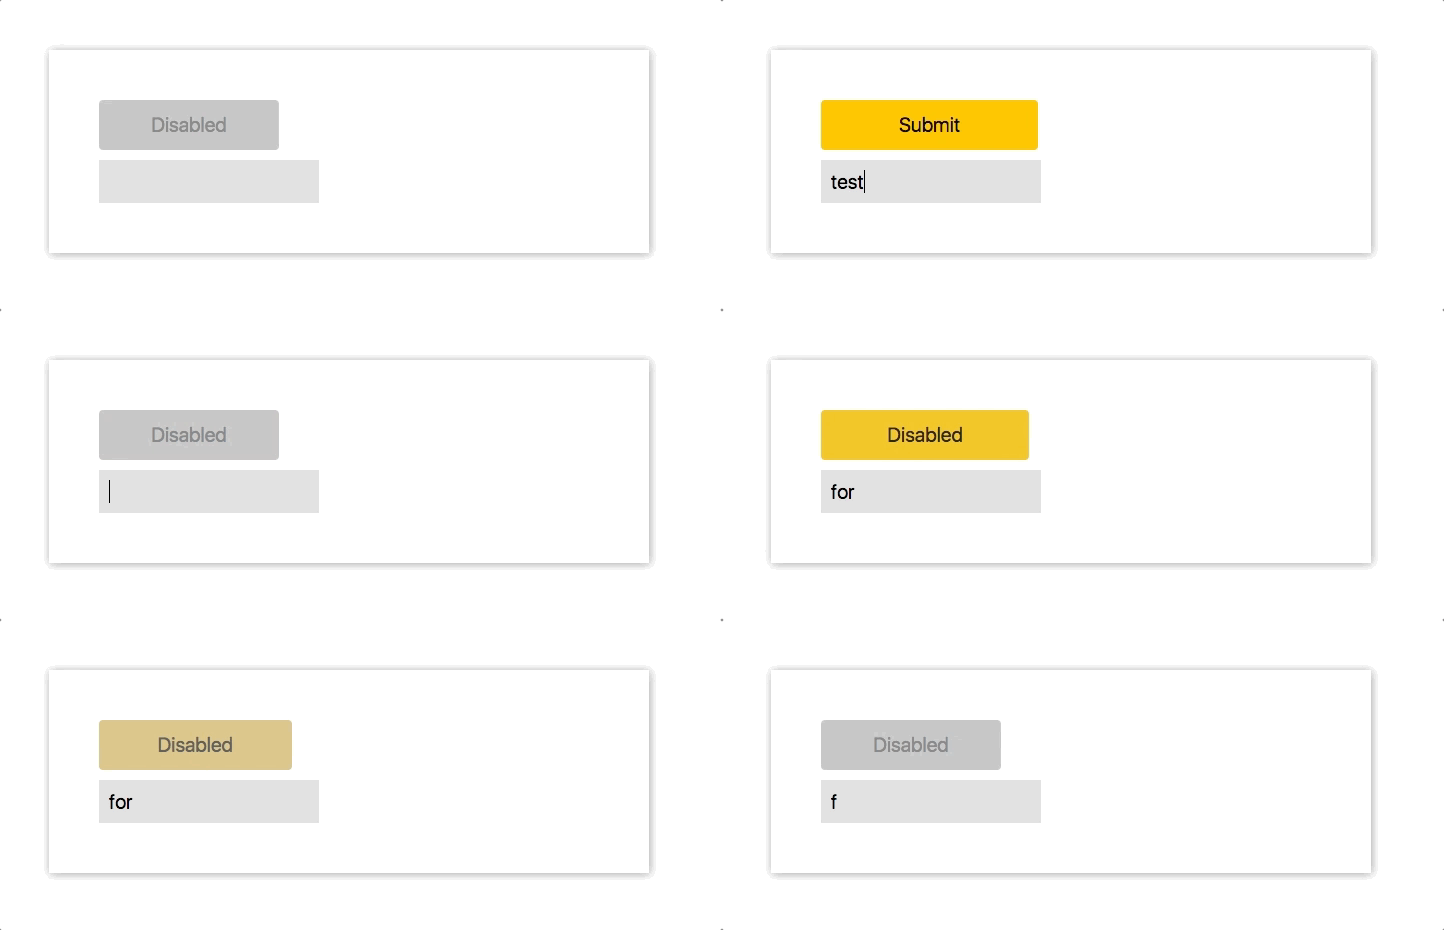
Phương thức onChange sẽ được gắn vào input để kiểm tra số chữ nhập vào input, nếu có 4 hoặc nhiều hơn 4 ký tự được nhập vào, thay đổi state disable thành false. Button sẽ animate trên width và backgroundColor khi state disable này thay đổi.
class App extends Component {
  state = {
    disabled: true,
  }
  onChange = (e) => {
    const length = e.target.value.length;
    if (length >= 4) {
      this.setState(() => ({ disabled: false }))
    } else if (!this.state.disabled) {
      this.setState(() => ({ disabled: true }))
    }
  }
  render() {
    const label = this.state.disabled ? 'Disabled' : 'Submit';
    return (
      <div className="App">
        <button
          style={Object.assign({}, styles.button, !this.state.disabled && styles.buttonEnabled)}
          disabled={this.state.disabled}
        >{label}</button>
        <input
          style={styles.input}
          onChange={this.onChange}
        />
      </div>
    );
  }
}

const styles = {
  input: {
    width: 200,
    outline: 'none',
    fontSize: 20,
    padding: 10,
    border: 'none',
    backgroundColor: '#ddd',
    marginTop: 10,
  },
  button: {
    width: 180,
    height: 50,
    border: 'none',
    borderRadius: 4,
    fontSize: 20,
    cursor: 'pointer',
    transition: '.25s all',
  },
  buttonEnabled: {
    backgroundColor: '#ffc107',
    width: 220,
  }
}
React Motion của tác giả Cheng Lou
Idea đăng sau React Motion là nó sẽ dựa trên API theo khái niệm "Spring", một khái niệm làm animation rất đã được bảo chứng ngon, làm việc tốt trong hầu hết các tình huống làm animation, nó không phụ thuộc vào timing, nghĩa là trong các trường hợp cần dừng, undo một animation giữa chừng thì làm được, chứ không cần đợi animation chạy hết.
Với React Motion, chúng ta set các giá trị để config cho React Motion component, chúng ta sẽ nhận về một callback chứa giá trị của style, lấy giá trị style này ta set lại trên component làm animation
<Motion style={{ x: spring(this.state.x) }}>
  {
    ({ x }) =>
      <div style={{ transform: `translateX(${x}px)` }} />
  }
</Motion>
Nhược
Performance không mướt bằng CSS/JS style trong một số tình huống. Phải học thêm cách tiếp cận khái niệm spring.
Ưu
React Motion làm việc tốt trên cả React Native và React Web, khái niệm "spring" thoạt đầu sẽ rất là kỳ khi sử dụng, nhưng cứ xài dần khi đã thắm sẽ thấy nó hay.

import React, { Component } from 'react';

import {Motion, spring} from 'react-motion';

class App extends Component {
  state = {
    height: 38
  }
  animate = () => {
    this.setState((state) => ({ height: state.height === 233 ? 38 : 233 }))
  }
  render() {
    return (
      <div className="App">
        <div style={styles.button} onClick={this.animate}>Animate</div>
        <Motion style={{ height: spring(this.state.height) }}>
          {
            ({ height }) => <div style={Object.assign({}, styles.menu, { height } )}>
              <p style={styles.selection}>Selection 1</p>
              <p style={styles.selection}>Selection 2</p>
              <p style={styles.selection}>Selection 3</p>
              <p style={styles.selection}>Selection 4</p>
              <p style={styles.selection}>Selection 5</p>
              <p style={styles.selection}>Selection 6</p>
            </div>
          }
        </Motion>
      </div>
    );
  }
}

const styles = {
  menu: {
    overflow: 'hidden',
    border: '2px solid #ddd',
    width: 300,
    marginTop: 20,
  },
  selection: {
    padding: 10,
    margin: 0,
    borderBottom: '1px solid #ededed'
  },
  button: {
    justifyContent: 'center',
    alignItems: 'center',
    display: 'flex',
    cursor: 'pointer',
    width: 200,
    height: 45,
    border: 'none',
    borderRadius: 4,
    backgroundColor: '#ffc107',
  },
}- import
Motionvàspringtừreact-motion - Set giá trị khởi tạo
height = 38 - hàm
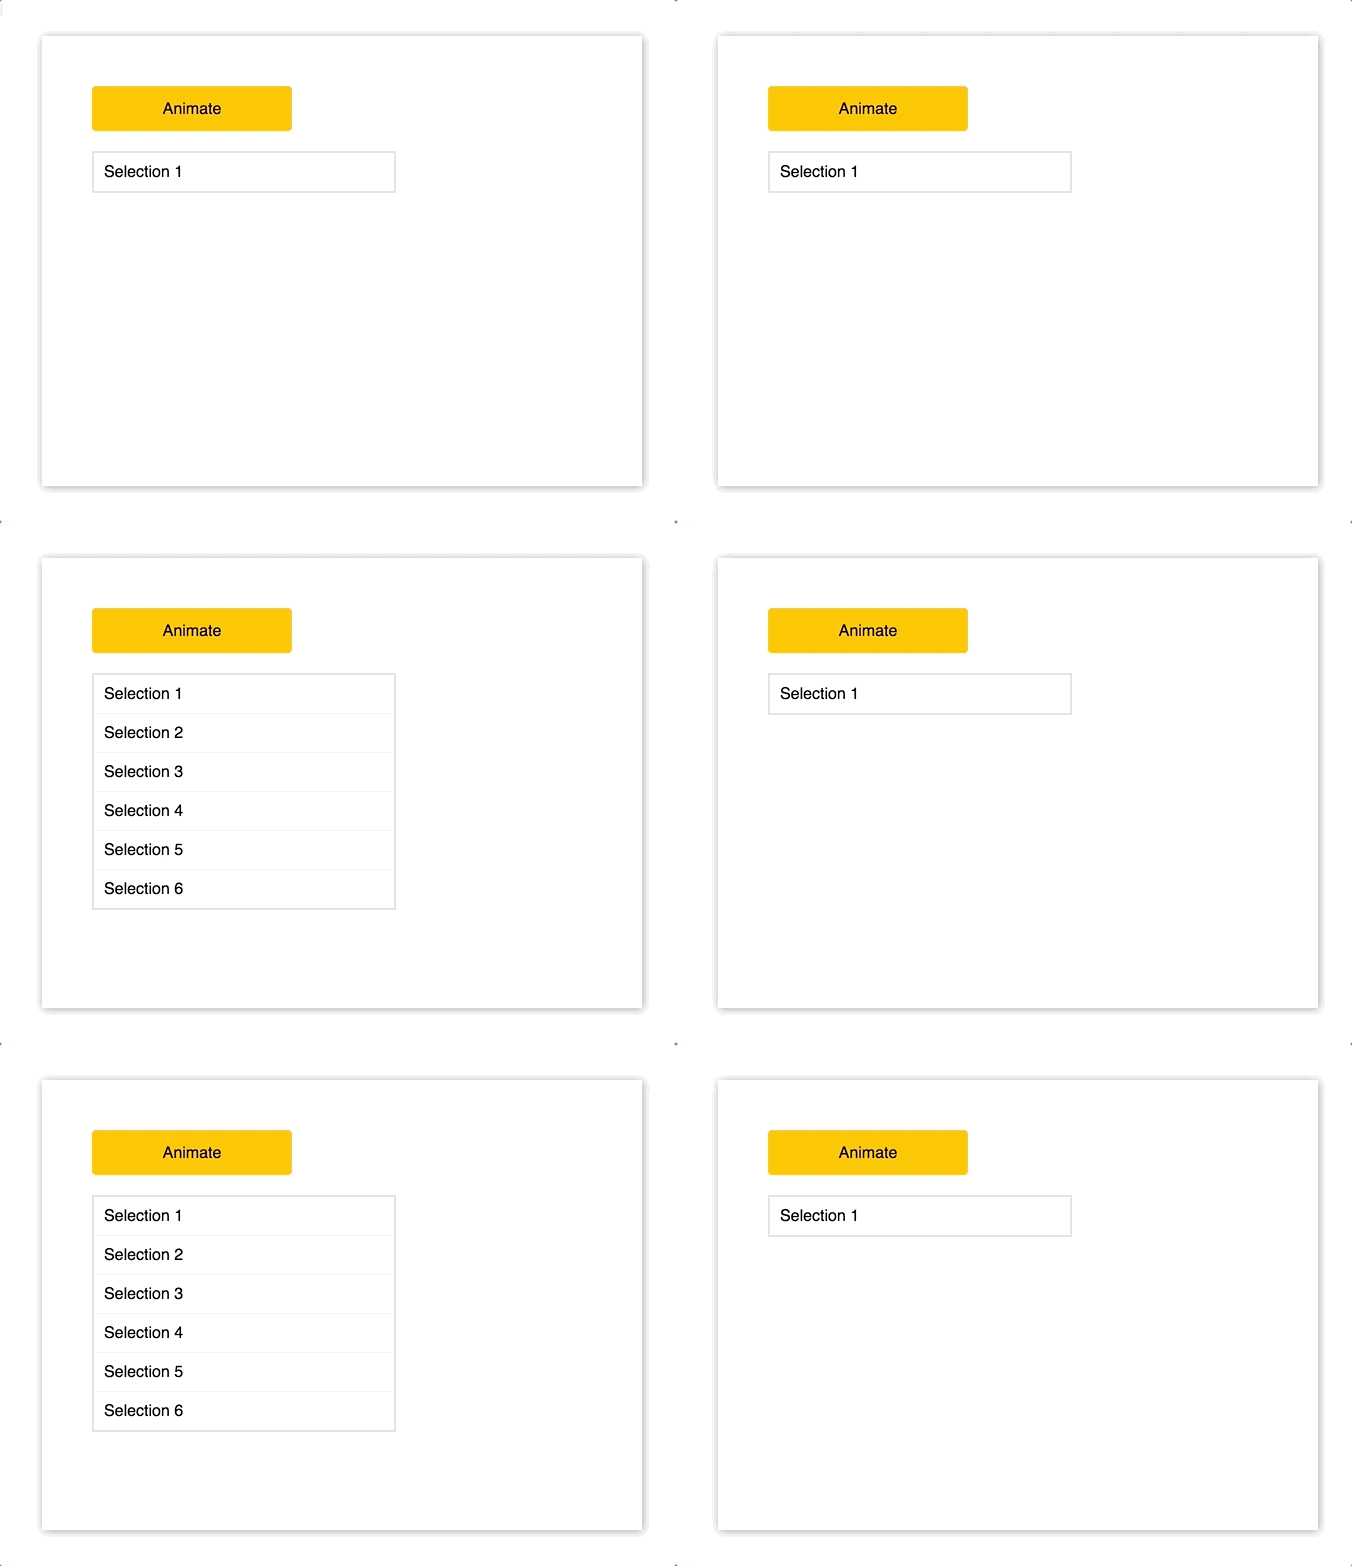
animatesẽ kiểm tra độ cao hiện tại, nếu là giá trị khởi tạo thì change nó sang 250, ngược lại set về 38 - Trong hàm render, sử dụng Motion component để wrap toàn bộ các tags
p, đưa giá trịthis.state.heightvào cho hàmspring, nó sẽ trả về một giá trịheighmới, lấy giá trịheightmới này set lên thằng component
Thư viện Animated
Thư viện Animated sử dụng tương tự như thư viện Animated dùng trong React Native.
Ý tưởng cơ bản của Animated là tạo ra các animation theo kiểu khai báo declarative, truyền một object để config chuyện gì sẽ xảy ra khi chạy animation.
Nhược
Chưa được 100% stable trên web theo như thực nghiệm, các trình duyệt cũ, một số vấn đề xảy ra với performance
Ưu
Cross Platform. Đã được kiểm chứng trong React Native, nếu đã học cách sử dụng nó thì có thể áp dụng luôn lúc làm React Native.
Để tìm hiểu thêm về thư viện này thì có thể thảm khảo blog và video của Jason Brown

import Animated from 'animated/lib/targets/react-dom';
import Easing from 'animated/lib/Easing';

class App extends Component {
  animatedValue = new Animated.Value(0)
  animate = () => {
    this.animatedValue.setValue(0)
    Animated.timing(
      this.animatedValue,
      {
        toValue: 1,
        duration: 1000,
        easing: Easing.elastic(1)
      }
    ).start();
  }
  render() {
    const marginLeft = this.animatedValue.interpolate({
      inputRange: [0, 1],
      outputRange: [-120, 0],
    })
    return (
      <div className="App">
          <div style={styles.button} onClick={this.animate}>Animate</div>
          <Animated.div
            style={
              Object.assign(
                {},
                styles.box,
                { opacity: this.animatedValue, marginLeft })}>
                <p>Thanks for your submission!</p>
            </Animated.div>
      </div>
    );
  }
}- Khởi tạo một class animateValue với giá trị ban đầu là 0
- Khai báo hàm
animate, hàm này sẽ handle tất cả animation sẽ thực thi, bên trong hàm này ta set giá trị về 0 bằngthis.animatedValue.setValue(0)để trigger animation chạy mỗi khi hàm được gọi. Khi gọi Animated.timing, truyền vào các giá trị sẽ animate, giá trị ban đầu, giá trị lúc kết thúc animate, duration, easing. - Trong hàm render, chúng ta tạo một giá trị mới
marginLeftsử dụng hàminterpolate, hàm này sẽ nhận về mảnginputRangevàoutputRange, nó sẽ tạo ra giá trị mới dựa trên input và output. Chúng ta lấy giá trị output này để set cho thuộc tínhmarginLeft - Thay vì sử dụng
divchúng ta phải sử dụngAnimated.div
Thư viện Velocity React
Thư viện Velocity React dựa trên thư viện Velocity DOM, phiên bản React của Velocity.
Có thể nói các API của Velocity React là sự kết hợp giữa Animated và React Motion. Nhìn chung là một thư viện khá thú vị, nếu chỉ đang làm web, am tưởng Velocity thì vô tư sử dụng.
Nhược
Hơi kỳ là nó không chạy trên componentDidMount mà bạn phải khai báo runOnMount, không hỗ trợ cross-platform
Ưu
API khá simple và dễ hiểu, dễ cài chạy cũng ngon
Khai báo simple như sau
<VelocityComponent
  animation={{ opacity: this.state.showSubComponent ? 1 : 0 }}
  duration={500}
>
  <MySubComponent/>
</VelocityComponent>
import { VelocityComponent } from 'velocity-react';

const VelocityLetter = ({ letter }) => (
  <VelocityComponent
    runOnMount
    animation={{ opacity: 1, marginTop: 0 }}
    duration={500}
  >
    <p style={styles.letter}>{letter}</p>
  </VelocityComponent>
)

class App extends Component {
  state = {
    letters: [],
  }
  onChange = (e) => {
    const letters = e.target.value.split('');
    const arr = []
    letters.forEach((l, i) => {
      arr.push(<VelocityLetter letter={l} />)
    })
    this.setState(() => ({ letters: arr }))
  }

  render() {
    return (
      <div className="App">
        <div className="container">
          <input onChange={this.onChange} style={styles.input} />
          <div style={styles.letters}>
            {
              this.state.letters
            }
          </div>
        </div>
      </div>
    );
  }
}

const styles = {
  input: {
    height: 40,
    backgroundColor: '#ddd',
    width: 200,
    border: 'none',
    outline: 'none',
    marginBottom: 20,
    fontSize: 22,
    padding: 8,
  },
  letters: {
    display: 'flex',
    height: 140,
  },
  letter: {
    opacity: 0,
    marginTop: 100,
    fontSize: 22,
    whiteSpace: 'pre',
  }
}
Kết luận
Với các animation đơn giản mình sẽ sử dụng JS Style animation, còn khi gặp các animation điên khùng của tụi design thì nghĩ tới React Motion, nếu là React Native, mình sẽ luôn sử dụng Animated.


Initializing...