Authenticator.jsHeader.jsHome.jsSignIn.jsSignUp.jsRouter.jsApp.js- Về vấn đề TOTP (time-based one-time passwords)
SignIn.js
Xem phần 1 ở đây
Phần này chúng ta tiếp tục với React Router, chúng ta chỉ cho phép những user đã login xem ứng dụng, redirect đến trang signup/sign in khi chưa đăng nhập.
Ta sẽ build component PrivateRoute, những trang mà user phải đăng nhập để vào xem, nếu cố tình access vào các trang mà chưa đăng nhập thì bị đá ra ngay
const PrivateRoute = ({component: Component, ...rest}) => (
    <Route
        {...rest}
        render={props =>
                isAuthenticated ? (
                    <Component {...props} />
                ) : (
                    <Redirect
                        to={{
                            pathname: "/auth"
                            }}
                    />
                )
            }
    />
);

<PrivateRoute path="/route1" component={Route1} />
Authenticator.js
Component sẽ là trang sign in và sign up, tách trang sign up và sign in ra 2 route cũng được nhưng làm thế này cho gọn.
import React from 'react'
import { css } from 'glamor'
import { withRouter } from 'react-router-dom'

import SignIn from './SignIn'
import SignUp from './SignUp'

class Authenticator extends React.Component {
  state = {
    showSignIn: true
  }
  switchState = (showSignIn) => {
    this.setState({
      showSignIn
    })
  }
  render() {
    const { showSignIn } = this.state
    return (
      <div>
        {
          showSignIn ? (
            <SignIn />
          ) : (
            <SignUp />
          )
        }
        <div {...css(styles.buttonContainer)}>
          <p
            {...css(styles.button, showSignIn && styles.underline)}
            onClick={() => this.switchState(true)}
          >Sign In</p>
          <p
            onClick={() => this.switchState(false)}
            {...css(styles.button, !showSignIn && styles.underline)}
          >Sign Up</p>
        </div>
      </div>
    )
  }
}

export default withRouter(Authenticator)

const styles = {
  buttonContainer: {
    display: 'flex',
    justifyContent: 'center'
  },
  button: {
    width: '100px',
    paddingBottom: '10px',
    cursor: 'pointer',
    borderBottom: '2px solid transparent'
  },
  underline: {
    borderBottomColor: '#ddd'
  }
}
Header.js
Component siêu căn bản, siêu quen thuộc
import React from 'react'
import { css } from 'glamor'

class Header extends React.Component {
  render() {
    return (
      <div {...css(styles.container)}>
        <h2 {...css(styles.title)}>Auth Demo</h2>
      </div>
    )
  }
}

const styles = {
  title: {
    color: 'white',
    margin: 0,
    padding: '25px',
    textAlign: 'left'
  },
  container: {
    height: '80px',
    width: '100%',
    backgroundColor: '#4CAF50'
  }
}

export default Header
Home.js
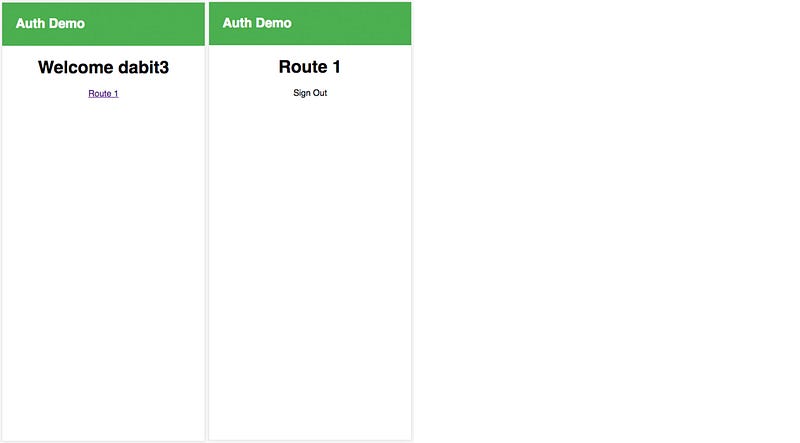
Trong file này ta sẽ thêm một vài component tương ứng cho 1 route, các component này chỉ được bind vô khi user đã đăng nhập, chuyện kiểm tra này sẽ nằm ở Route
import React from 'react'
import { withRouter, Link } from 'react-router-dom'
import { Auth } from 'aws-amplify'

class Home extends React.Component {
  state = {
    username: '',
  }
  componentDidMount() {
    Auth.currentUserInfo()
      .then(data => {
        this.setState({
          username: data.username
        })
      })
      .catch(err => console.log('error: ', err))
  }
  render() {
    return (
      <div>
        <h1>Welcome {this.state.username}</h1>
        <Link to='/route1' label='route1'>Route 1</Link>
      </div>
    )
  }
}

class Route1 extends React.Component {
  render() {
    return (
      <div>
        <h1>Route 1</h1>
        <p onClick={() => {
          Auth.signOut()
            .then(() => {
              this.props.history.push('/auth')
            })
            .catch(() => console.log('error signing out...'))
        }}>Sign Out</p>
      </div>
    )
  }
}

Home = withRouter(Home)
Route1 = withRouter(Route1)

export {
  Home,
  Route1
}
Các component trên điều được lồng qua withRouter để có thể truy cập vào prop history trong React Router trong trường hợp cần navigate đến một trang khác.

SignIn.js
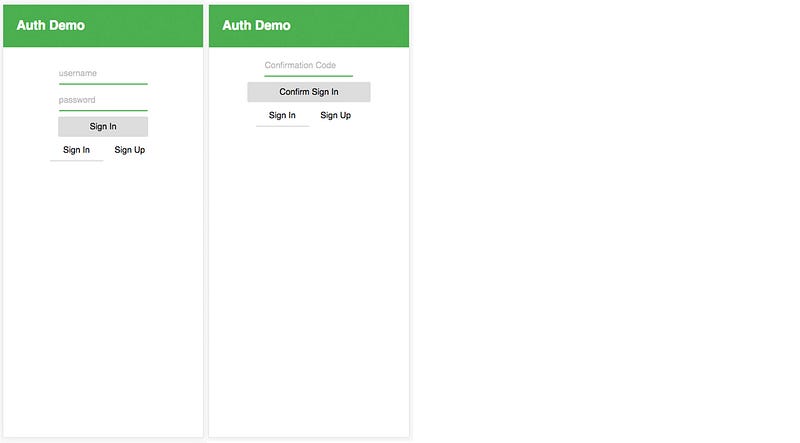
Update lại component từ phần 1, chỉ một chổ khác là ta sẽ ẩn phần confirm code đi, khi confirmSignIn trả về thành công, ta navigate user đến route Home sử dụng history prop
history.push('/')
import React from 'react'
import { css } from 'glamor'
import { Auth } from 'aws-amplify'

import { withRouter } from 'react-router-dom'

class SignIn extends React.Component {
  state = {
    username: '',
    password: '',
    showConfirmation: false,
    user: {},
    authCode: ''
  }
  onChange = (key, value) => {
    this.setState({
      [key]: value
    })
  }
  signIn = () => {
    Auth.signIn(this.state.username, this.state.password)
      .then(user => {
        this.setState({ user, showConfirmation: true })
      })
      .catch(err => console.log('error signing in...: ', err))
  }
  confirmSignIn = () => {
    const { history } = this.props
    Auth.confirmSignIn(this.state.user, this.state.authCode)
      .then(user => {
        history.push('/')
      })
      .catch(err => console.log('error confirming signing in...: ', err))
  }
  render() {
    return (
      <div {...css(styles.container)}>
        {
          !this.state.showConfirmation && (
            <div {...css(styles.container)}>
              <input
                onChange={evt => this.onChange('username', evt.target.value)}
                {...css(styles.input)}
                placeholder='username'
              />
              <input
                type='password'
                onChange={evt => this.onChange('password', evt.target.value)}
                {...css(styles.input)}
                placeholder='password'
              />
              <div {...css(styles.button)} onClick={this.signIn}>
                <p {...css(styles.buttonText)}>Sign In</p>
              </div>
            </div>
          )
        }
        {
          this.state.showConfirmation && (
            <div>
              <input
                onChange={evt => this.onChange('authCode', evt.target.value)}
                {...css(styles.input)}
                placeholder='Confirmation Code'
              />
              <div {...css(styles.button)} onClick={this.confirmSignIn.bind(this)}>
                <p {...css(styles.buttonText)}>Confirm Sign In</p>
              </div>
            </div>
          )
        }
      </div>
    )
  }
}

const styles = {
  button: {
    padding: '10px 60px',
    backgroundColor: '#ddd',
    cursor: 'pointer',
    borderRadius: '3px',
    ':hover': {
      backgroundColor: '#ededed'
    }
  },
  buttonText: {
    margin: 0
  },
  input: {
    height: 40,
    marginBottom: '10px',
    border: 'none',
    outline: 'none',
    borderBottom: '2px solid #4CAF50',
    fontSize: '16px',
    '::placeholder': {
      color: 'rgba(0, 0, 0, .3)'
    }
  },
  container: {
    flex: 1,
    paddingTop: '15px',
    display: 'flex',
    alignItems: 'center',
    justifyContent: 'center',
    flexDirection: 'column'
  }
}

export default withRouter(SignIn)
SignUp.js
Cập nhập lại từ phần 1
import React from 'react'
import { css } from 'glamor'
import { withRouter } from 'react-router-dom'

import { Auth } from 'aws-amplify'

class SignUp extends React.Component {
  state = {
    username: '',
    password: '',
    email: '',
    phone_number: '',
    authCode: '',
    showConfirmation: false
  }
  onChange = (key, value) => {
    this.setState({
      [key]: value
    })
  }
  signUp = () => {
    const { username, password, email, phone_number } = this.state
    Auth.signUp({
      username,
      password,
      attributes: {
        email,
        phone_number
      }
    })
    .then(() => this.setState({ showConfirmation: true }))
    .catch(err => console.log('error signing up: ', err))
  }
  confirmSignUp = () => {
    Auth.confirmSignUp(this.state.username, this.state.authCode)
    .then(() => this.props.history.push('/'))
    .catch(err => console.log('error confirming signing up: ', err))
  }
  render() {
    const { showConfirmation } = this.state
    return (
      <div {...css(styles.container)}>
        {
          !showConfirmation && (
            <div {...css(styles.container)}>
              <input
                {...css(styles.input)}
                placeholder='Username'
                onChange={evt => this.onChange('username', evt.target.value)}
              />
              <input
                {...css(styles.input)}
                placeholder='Password'
                type='password'
                onChange={evt => this.onChange('password', evt.target.value)}
              />
              <input
                {...css(styles.input)}
                placeholder='Email'
                onChange={evt => this.onChange('email', evt.target.value)}
              />
              <input
                {...css(styles.input)}
                placeholder='Phone Number'
                onChange={evt => this.onChange('phone_number', evt.target.value)}
              />
              <div {...css(styles.button)} onClick={this.signUp}>
                <p {...css(styles.buttonText)}>Sign Up</p>
              </div>
            </div>
          )
        }
        {
          showConfirmation && (
            <div>
              <input
                onChange={evt => this.onChange('authCode', evt.target.value)}
                {...css(styles.input)}
                placeholder='Confirmation Code'
              />
              <div {...css(styles.button)} onClick={this.confirmSignUp}>
                <p {...css(styles.buttonText)}>Confirm Sign Up</p>
              </div>
            </div>
          )
        }
      </div>
    )
  }
}

const styles = {
  button: {
    padding: '10px 60px',
    backgroundColor: '#ddd',
    cursor: 'pointer',
    borderRadius: '3px',
    ':hover': {
      backgroundColor: '#ededed'
    }
  },
  buttonText: {
    margin: 0
  },
  container: {
    flex: 1,
    display: 'flex',
    alignItems: 'center',
    justifyContent: 'center',
    flexDirection: 'column',
    paddingTop: '15px'
  },
  input: {
    height: 40,
    marginBottom: '10px',
    border: 'none',
    outline: 'none',
    borderBottom: '2px solid #4CAF50',
    fontSize: '16px',
    '::placeholder': {
      color: 'rgba(0, 0, 0, .3)'
    }
  },
}

export default withRouter(SignUp)
Router.js
Cuối cùng, last but not least, router
import React from 'react'
import {
  withRouter,
  Switch,
  Route,
  Redirect,
  BrowserRouter as Router
} from 'react-router-dom'
import { Auth } from 'aws-amplify'

import Authenticator from './Authenticator'
import {
  Home,
  Route1
} from './Home'

class PrivateRoute extends React.Component {
  state = {
    loaded: false,
    isAuthenticated: false
  }
  componentDidMount() {
    this.authenticate()
    this.unlisten = this.props.history.listen(() => {
      Auth.currentAuthenticatedUser()
        .then(user => console.log('user: ', user))
        .catch(() => {
          if (this.state.isAuthenticated) this.setState({ isAuthenticated: false })
        })
    });
  }
  componentWillUnmount() {
    this.unlisten()
  }
  authenticate() {
    Auth.currentAuthenticatedUser()
      .then(() => {
        this.setState({ loaded: true, isAuthenticated: true })
      })
      .catch(() => this.props.history.push('/auth'))
  }
  render() {
    const { component: Component, ...rest } = this.props
    const { loaded , isAuthenticated} = this.state
    if (!loaded) return null
    return (
      <Route
        {...rest}
        render={props => {
          return isAuthenticated ? (
            <Component {...props} />
          ) : (
            <Redirect
              to={{
                pathname: "/auth",
              }}
            />
          )
        }}
      />
    )
  }
}

PrivateRoute = withRouter(PrivateRoute)

const Routes = () => (
  <Router>
    <Switch>
      <Route path='/auth' component={Authenticator} />
      <PrivateRoute path='/route1' component={Route1} />
      <PrivateRoute path='/' component={Home} />
    </Switch>
  </Router>
)

export default Routes
Trong phần import sử dụng component Redirect của react-router-dom, component này sẽ cho phép navigate user đến một route mới, làm web chắc ai cũng biết redirect là gì mà.
Component PrivateRoute có nhiệm vụ là một container cho các route cần kiểm tra tình trạng đăng nhập.
Khởi tạo state là loaded và isAuthenticated với giá trị ban đầu là false
componentDidMount - chúng ta làm chuyện là kiểm tra ngay và luôn tình trạng hôn nhân gia đình, không tình trạng login, nếu chưa thì mời em đến phòng đăng ký (kết hôn), đồng thời trong ta tạo ra tình trạng "hóng tin", listen các sự thay đổi của history (dùng this.props.history.listen) và kiểm tra lại trình trạng đăng nhập
App.js
Bên trong component App và ta có thể thu gọn lại
import React, { Component } from 'react';
import './App.css'

import Header from './Header'
import Router from './Router'

class App extends Component {
  render() {
    return (
      <div className="App">
        <Header />
        <Router />
      </div>
    );
  }
}

export default App
Về vấn đề TOTP (time-based one-time passwords)
TOTP đang trở thành lựa chọn số một của các công ty đề cao tính bảo mật tuyệt đối khi muốn dùng MFA ( Multi-Factor Authentication ), thay thế cho việc dùng MFA với SMS. Sử dụng những ứng dụng như Authy, Google Authenticator & Dou để tạo ra một access token tạm thời, expire trong 30 đến 60 giây.
Cognito và bây giờ là AWS Amplify cũng đã bổ sung tính năng này, thử mở rộng ứng dụng ra với tính năng này
Trước khi sử dụng TOTP thì chúng ta nên nhớ một điều rằng: đừng bao giờ ép buộc user sử dụng nó thay cho MFA, trừ khi user cố tình chọn, vì TOTP thì xài cũng rất ư là phiền phức cho user, với những ứng dụng mà user không cung cấp bất kỳ thông tin gì quan trọng thì hà chi phải làm khó user vậy
Flow sẽ như thế này
- User đăng ký, mặc định dùng MFA với SMS
- User đăng nhập, ở một hóc bà tó nào đó của ứng dụng, thường là trong mục thiết đặt, cho phép user sử dụng TOTP.
- User bật TOTP lên, cho họ một cái QR Code, họ lấy điện thoại mà scan cái QR code này, kiểu Zalo đó mấy bạn.
- Cho phép user quay lại SMS nếu thích
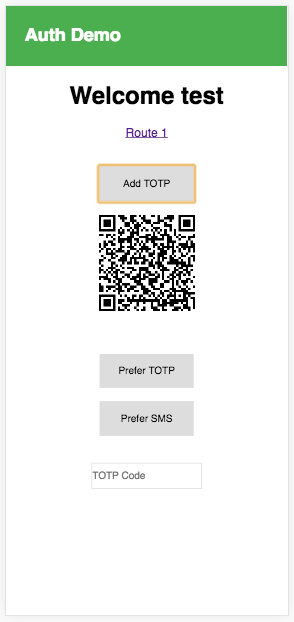
Trong ứng dụng ví dụ thì ta thêm nó luôn vô trong Home, sử dụng phương thức Auth.setupTOTP, nó sẽ trả về một promise để chúng ta dùng tạo QR code cho user
Auth.setupTOTP(user).then(code => /* create qrcode */ )Cài thêm qrcode.react
npm install qrcode.react --saveBên trong component Home, thêm phương thức addTop để set QRCode, nhớ import QRCode trong Home nha.
addTTOP = () => {
  Auth.setupTOTP(this.state.user).then(code => {
    const authCode = "otpauth://totp/AWSCognito:" + this.state.user.username + "?secret=" + code + "&issuer=AWSCognito";
    this.setState({ qrCode: authCode })
  });
}
Cho phép user chọn phương thức xác thực tài khoản MFA hay TOTP
setPreferredMFA = (authType) => {
  Auth.verifyTotpToken(
    this.state.user,
    this.state.challengeAnswer
  ).then(() => {
    Auth.setPreferredMFA(this.state.user, authType)
      .then(data => console.log('MFA update success: ', data))
      .catch(err => console.log('MFA update error: ', err))
  })
}
Trên UI thêm chổ nhập TOTP code, một vài cái button
render() {
  <div>
    // previous code omitted
    <button
      onClick={this.addTTOP}
      style={{ border: '1px solid #ddd', width: 125 }}
    >
    <p>Add TOTP</p>
    </button>
    {
      (this.state.qrCode !== '') && (
        <div>
          <QRCode value={this.state.qrCode} />
        </div>
      )
    }
    <br />
    <button
      onClick={() => this.setPreferredMFA('TOTP')}
      style={{ border: '1px solid #ddd', width: 125 }}
    >
      <p>Prefer TOTP</p>
    </button>
    <br />
    <input
      placeholder='TOTP Code'
      onChange={e => this.setState({
        challengeAnswer: e.target.value
      })}
      style={{ border: '1px solid #ddd', height: 35 }}
    />
  </div>
}
SignIn.js
Update lại phương thức signin để sử dụng MFA, các thông tin cần thiết của user nằm trong object user.challengename, chúng ta sử dụng để truyền vào cho Auth.confirmSignIn
confirmSignIn = () => {
  const { history } = this.props
  Auth.confirmSignIn(this.state.user, this.state.authCode, this.state.user.challengeName)
  // rest of code omitted
}
Lúc này sau khi user đăng nhập có thể click vào nút Add TOTP, scan đoạn QR code và chuyển sang chế độ authentication dùng TOTP
Bài dịch từ tác giả Nader Dabit trên HackerNoon


Initializing...